The Complete Guide to Hiking Emergency Procedures: Essential Wilderness Safety Protocols
When I first started hiking in the Rocky Mountains, I never imagined how quickly a peaceful trail could turn into a life-threatening situation. After spending over a decade exploring wilderness areas and working with search and rescue teams, I've learned that proper hiking emergency procedures can mean the difference between a minor inconvenience and a tragic outcome. This comprehensive guide covers everything you need to know about preventing, responding to, and surviving wilderness emergencies.
Prevention and Pre-Trip Planning
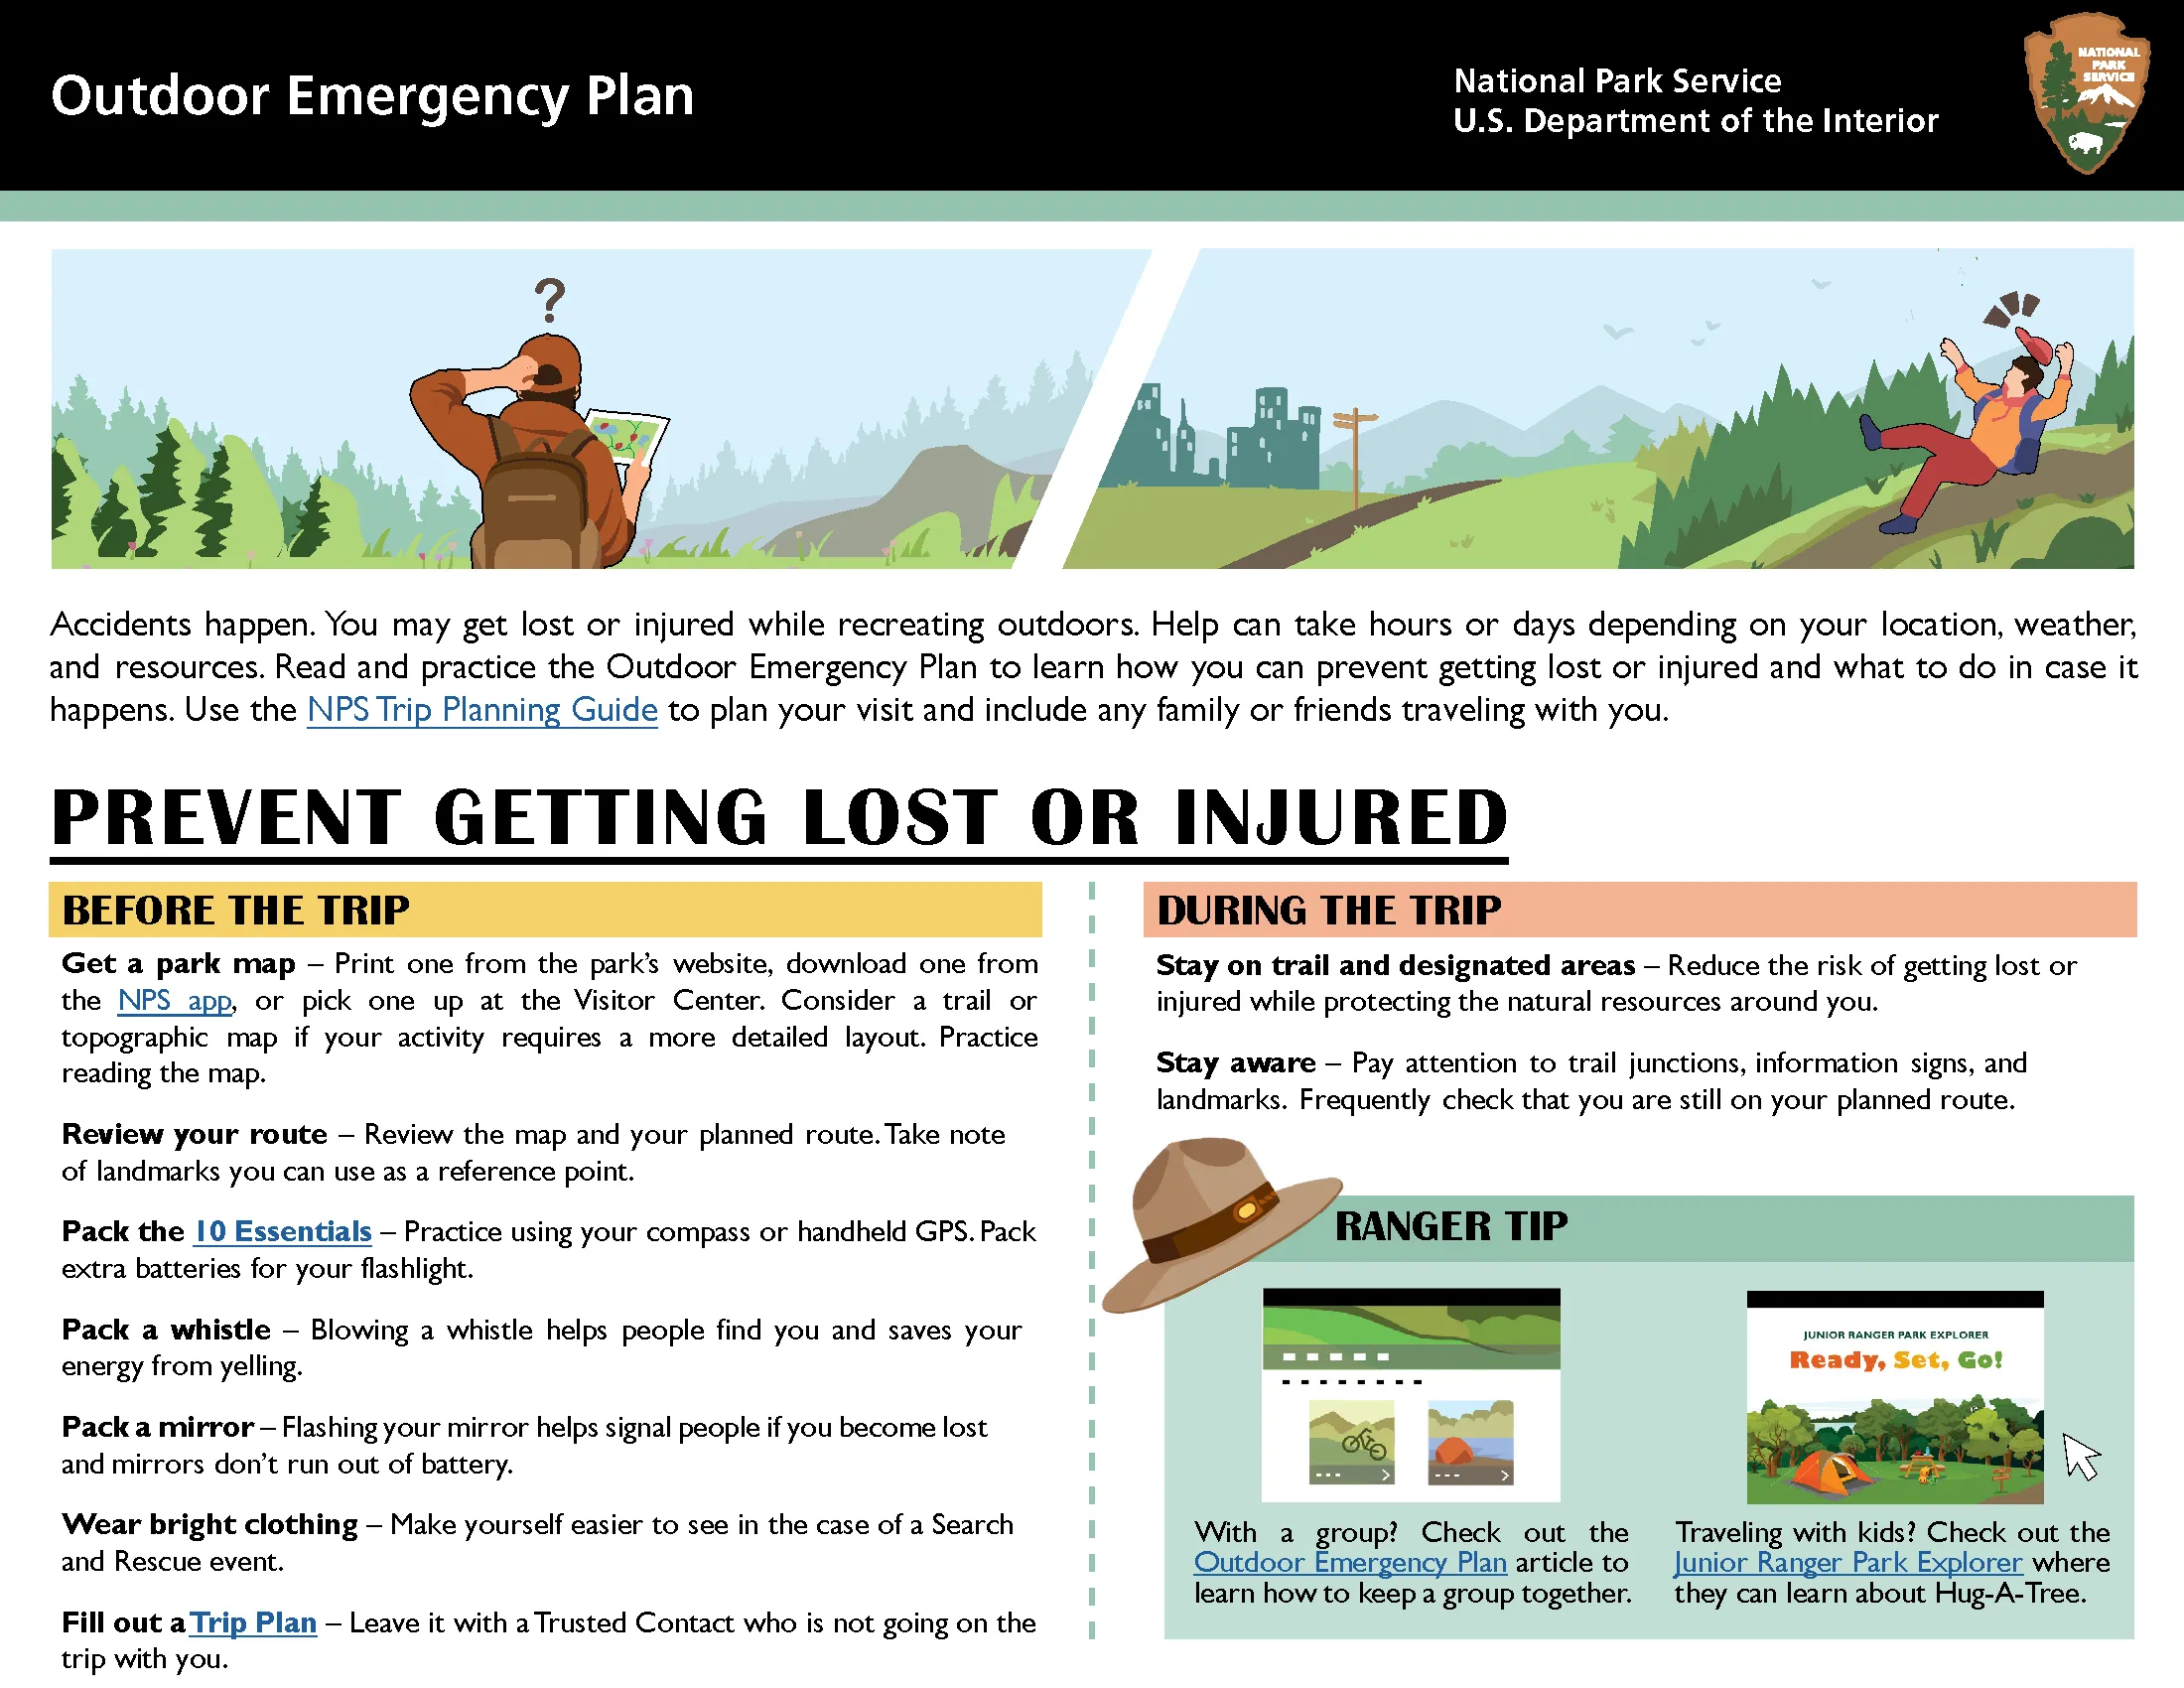
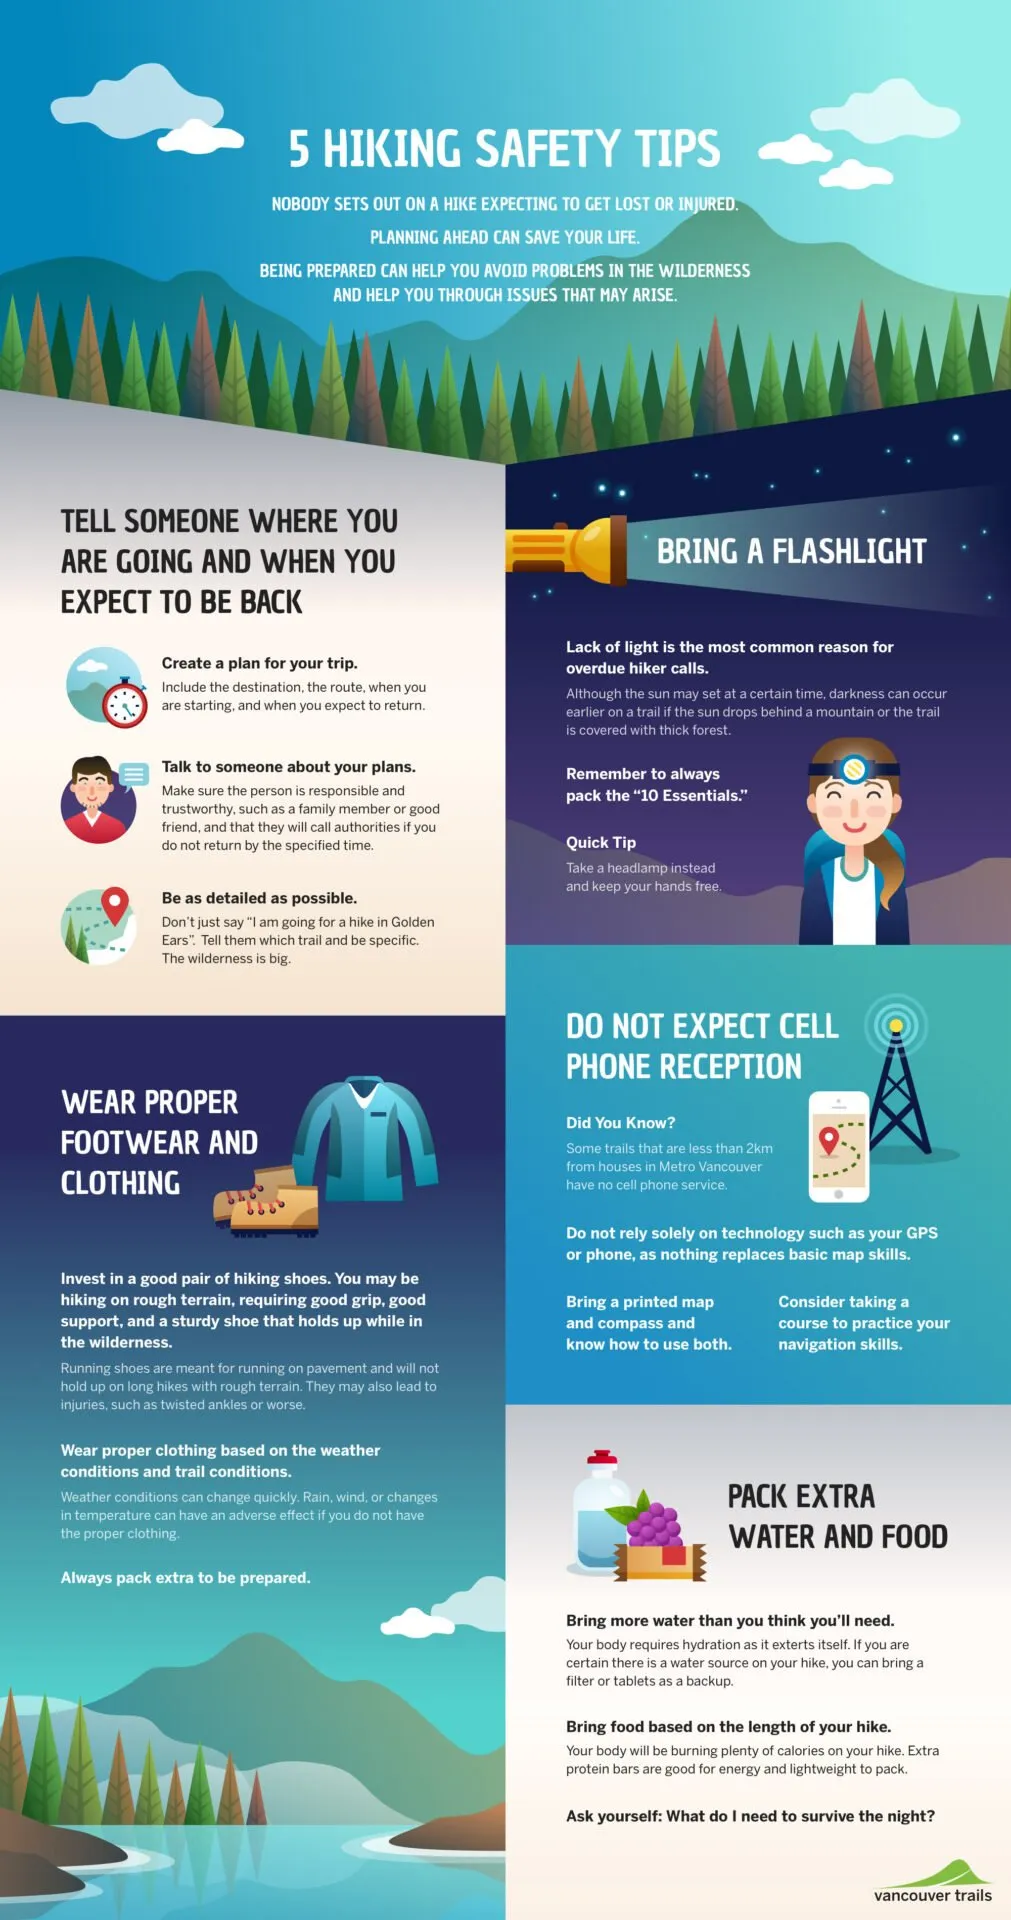
The most effective hiking emergency procedures begin long before you set foot on the trail. During my years as a wilderness guide, I've observed that 80% of hiking emergencies could have been prevented with proper planning and preparation. Effective prevention involves understanding your limitations, researching your route thoroughly, and creating comprehensive emergency plans.

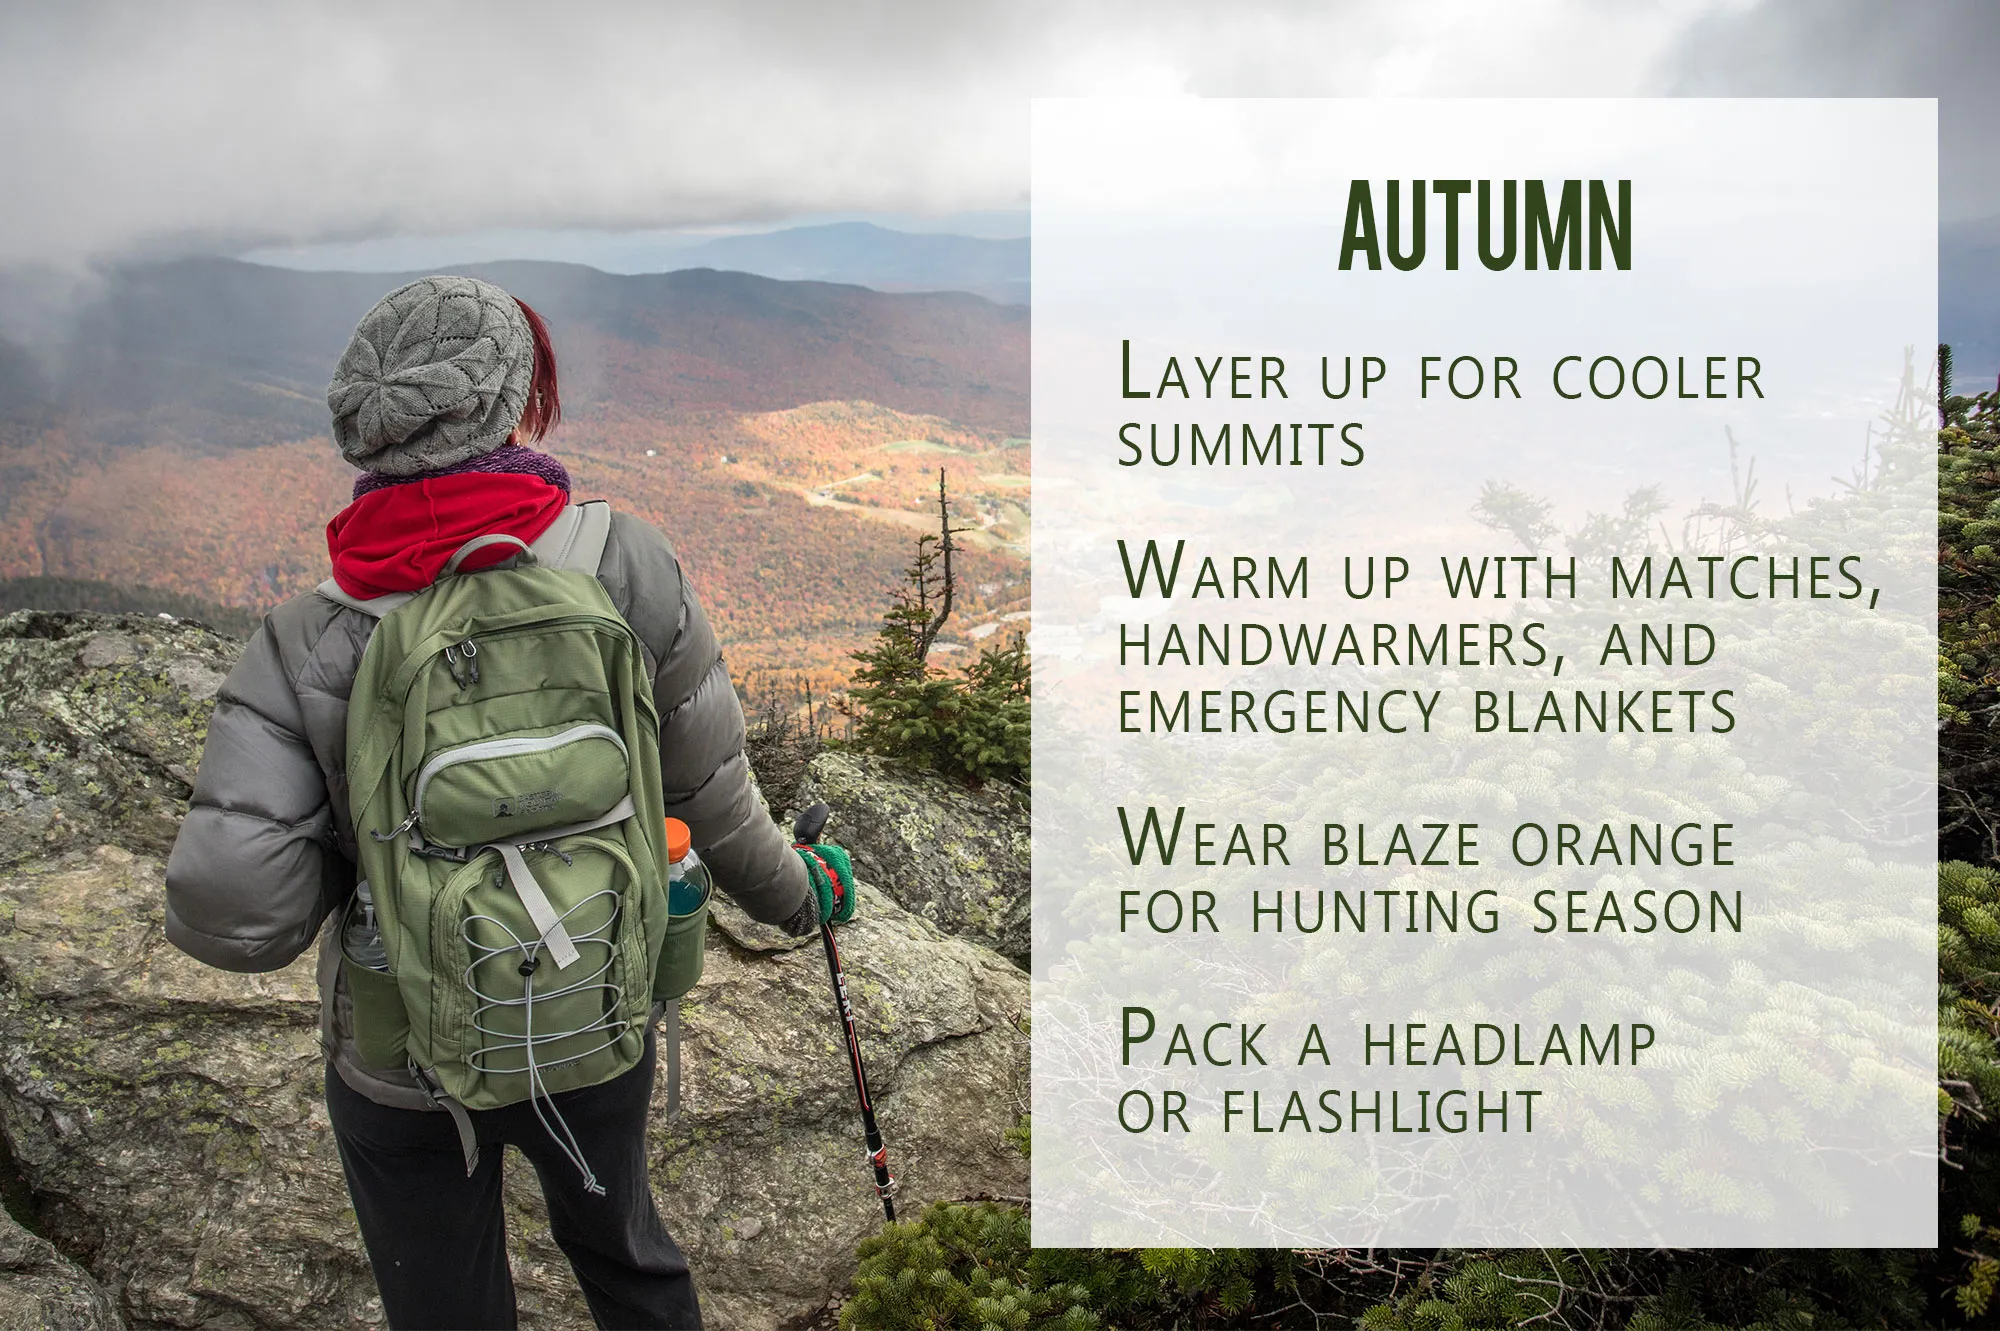
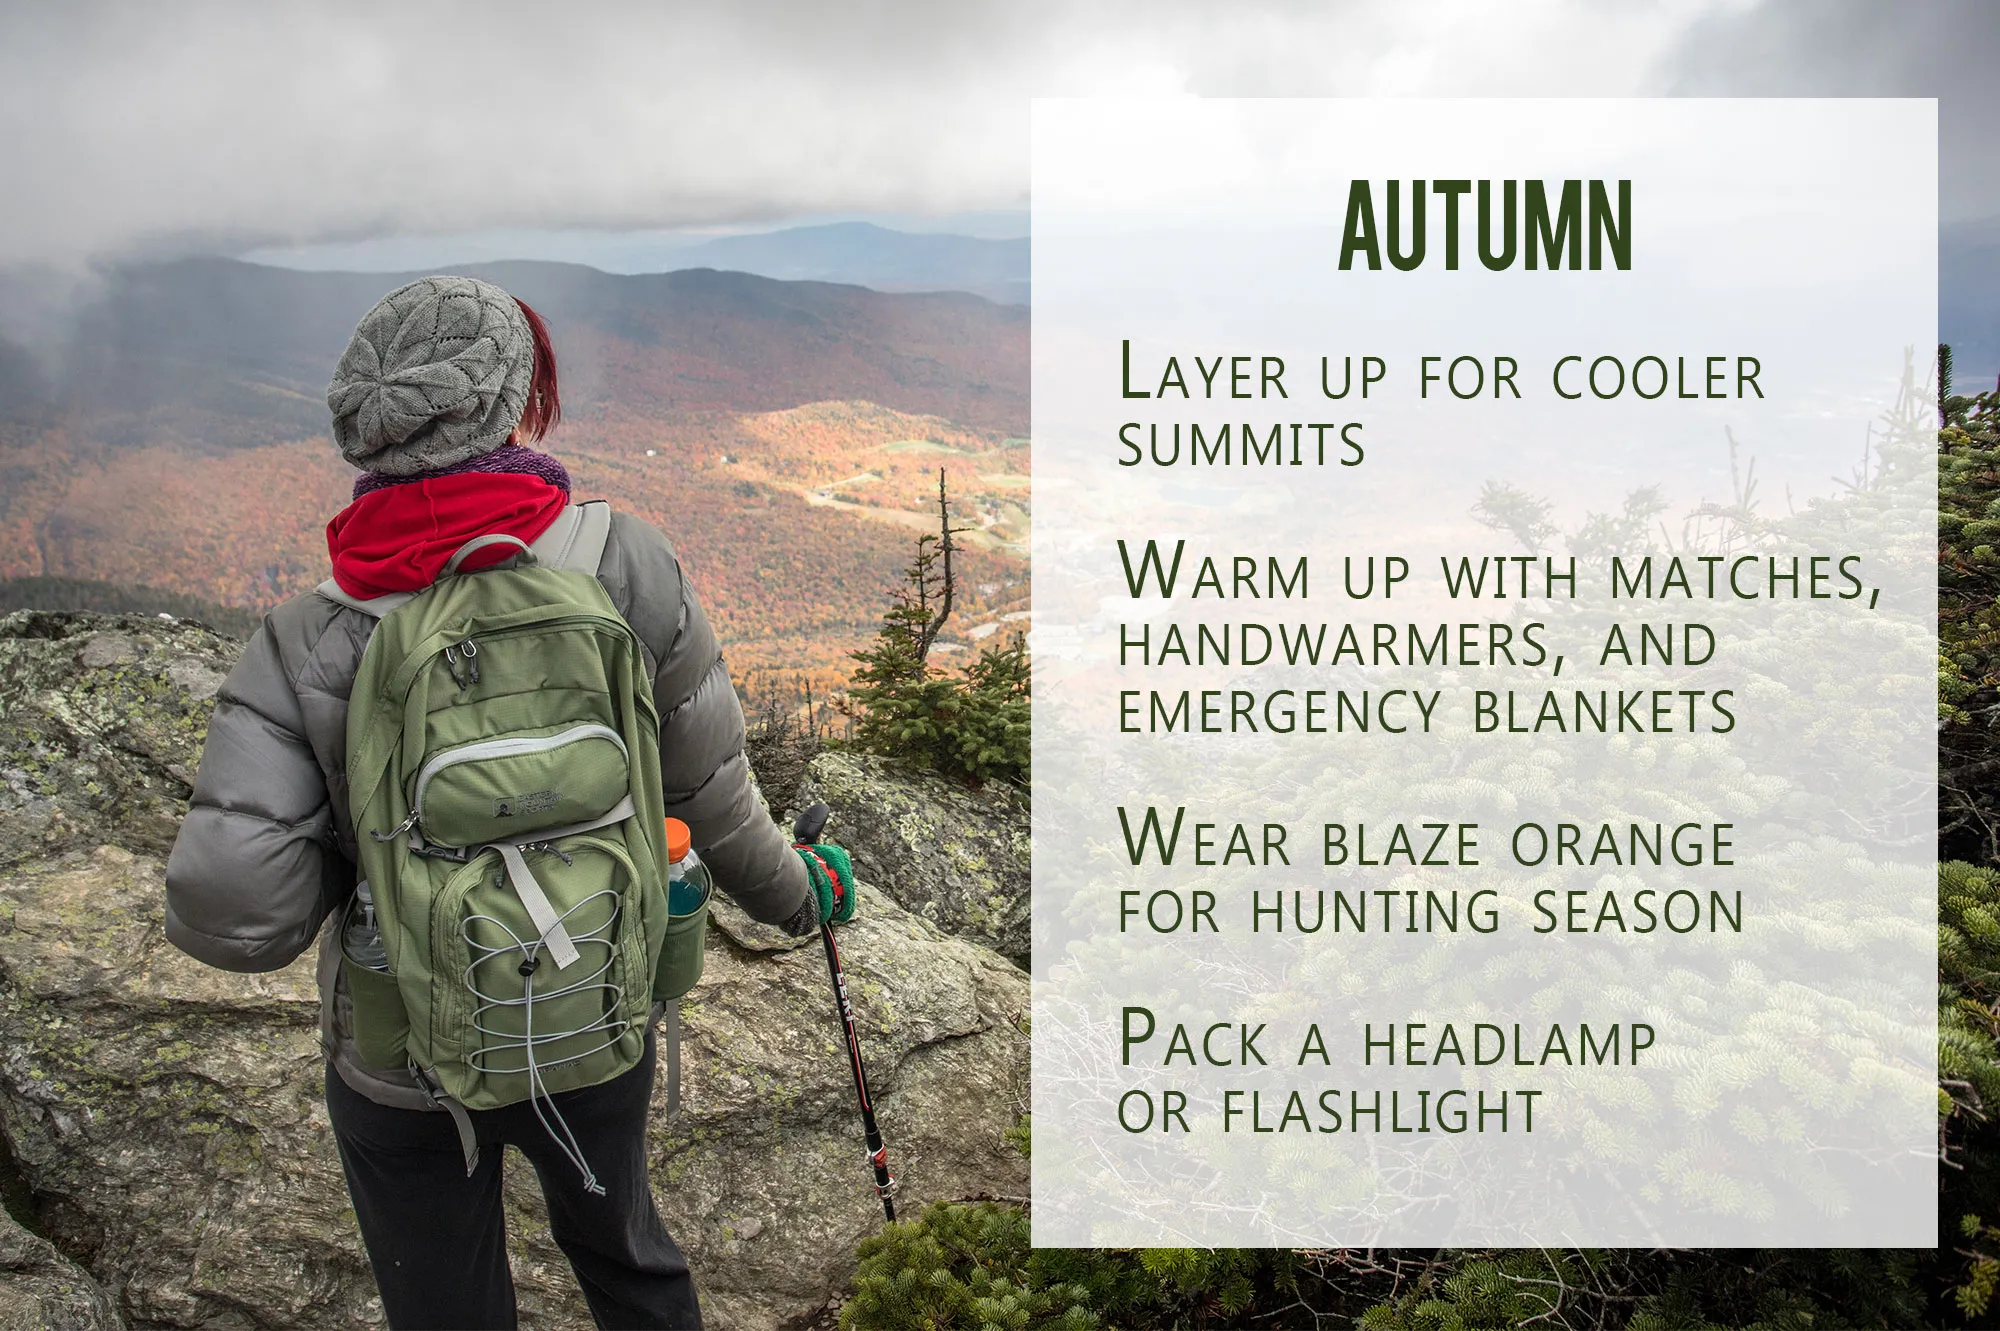
Weather assessment forms the cornerstone of hiking emergency procedures. I always check multiple weather sources 48 hours before departure, including NOAA forecasts, local ranger stations, and mountain weather services. Temperature fluctuations in alpine environments can be dramatic – I've experienced 40-degree temperature swings within six hours. Pack layers for conditions 20 degrees colder than predicted, and always prepare for sudden weather changes.
Route planning requires detailed study of topographic maps, recent trail conditions, and seasonal hazards. I maintain detailed trip plans that include specific waypoints, estimated travel times, emergency exit routes, and GPS coordinates for key locations. Staying safe off-trail becomes crucial when weather forces route changes or when you encounter trail closures.
Emergency Contact Protocol:
Always leave detailed itineraries with reliable emergency contacts who understand when to call for help. Include specific "check-in" times and clear instructions for when they should contact search and rescue services.
Equipment preparation involves more than just packing the ten essentials. I recommend conducting gear checks 24 hours before departure, testing all electronic devices, and verifying battery levels on GPS units and emergency beacons. Create redundant systems for critical items like navigation, fire-starting, and emergency signaling. The investment in quality emergency gear pays dividends when hiking emergency procedures become necessary.
🌟 Essential Emergency Gear Recommendation
Garmin inReach SE+ Satellite Communicator - Your Lifeline in Remote Areas
🛒 Check Price on AmazonTwo-way satellite communication, GPS tracking, and SOS emergency alerts even where cell phones fail.
Emergency Assessment and Initial Response
When emergencies strike on the trail, your first few minutes of response often determine the outcome. I learned this lesson during a winter rescue in Colorado when a hiker fell through ice on a mountain lake. The systematic approach we used – Stop, Think, Observe, Plan (STOP) – prevented the situation from escalating into multiple casualties.
Scene safety assessment must occur before approaching any emergency situation. Environmental hazards like rockfall zones, unstable snow, swift water, or weather deterioration can quickly create additional victims. I always position myself and my group in safe locations with clear escape routes before beginning any rescue attempt. This principle of hiking emergency procedures has saved countless lives by preventing rescuer casualties.
Victim assessment follows the primary survey protocol: Airway, Breathing, Circulation, Disability, and Exposure (ABCDE). In wilderness settings, this assessment takes on additional complexity due to environmental factors and evacuation considerations. I've found that maintaining calm communication with conscious victims provides valuable information about their condition while reducing anxiety that can worsen their situation.
Resource inventory involves cataloging available personnel, equipment, weather conditions, and daylight remaining. This information shapes all subsequent decisions about evacuation methods, shelter needs, and communication priorities. Group dynamics become crucial during emergencies – designating specific roles prevents chaos and ensures important tasks aren't overlooked. Survival tips if lost become essential when emergencies occur in remote locations with limited visibility or known position.
⚠️ Critical Decision Points
- Self-evacuation capability: Can the victim walk out with assistance?
- Weather window: How much time before conditions deteriorate?
- Communication options: What signaling methods are available?
- Group resources: What equipment and personnel are available?
Signaling for Help and Communication
Effective signaling can dramatically reduce rescue times and improve survival outcomes. During a search and rescue operation in Olympic National Park, I witnessed how proper signaling techniques helped locate a lost hiker within hours rather than days. Modern hiking emergency procedures integrate traditional signaling methods with contemporary technology to maximize rescue probability.

Electronic signaling devices provide the most reliable communication in remote areas. Personal Locator Beacons (PLBs) transmit distress signals directly to rescue coordination centers via satellite networks. I always carry a PLB on extended wilderness trips because they function independently of cell towers and provide GPS coordinates to within meters of your location. Satellite communicators offer two-way messaging capabilities, allowing you to provide detailed information about your emergency situation.
Visual signaling techniques remain essential backup methods when electronic devices fail or batteries drain. Signal mirrors can be seen from aircraft up to 50 miles away on clear days. I practice mirror signaling regularly because proper technique requires skill to aim reflected sunlight accurately. Ground-to-air signals using bright fabric, rocks, or snow follow international standards: X means "unable to proceed," I means "need medical assistance," and V means "require assistance."
🔄 Multi-Tool Emergency Signaling Kit
2-Piece Signal Mirror & Whistle Emergency Kit with Compass
🛒 Get Emergency KitProfessional-grade signaling mirror with targeting sight, emergency whistle, and backup compass in waterproof kit.
Audio signaling proves particularly effective in dense forests or poor visibility conditions. The international distress signal consists of three sharp blasts repeated at regular intervals. Quality emergency whistles produce sounds audible over a mile away and require minimal energy to operate. I recommend pealess whistles because they function reliably in wet conditions and extreme temperatures.
Cellular technology works in many wilderness areas, though coverage remains unreliable. When you have cell signal, immediately call 911 and provide GPS coordinates, specific location descriptions, nature of emergency, number of people involved, and current weather conditions. Text messages often transmit successfully when voice calls fail, so consider sending detailed emergency information via SMS. How to signal for help encompasses both traditional and modern techniques that every hiker should master.
Wilderness First Aid and Medical Emergencies
Wilderness first aid differs significantly from urban emergency care due to extended response times, limited resources, and environmental challenges. During my wilderness EMT training, I learned that decisions made in the first golden hour often determine patient outcomes. Hiking emergency procedures must account for the reality that professional medical help may be hours or days away.

Common hiking injuries include ankle sprains, cuts and lacerations, hypothermia, dehydration, and altitude sickness. Each requires specific treatment protocols adapted to wilderness conditions. Ankle injuries, for example, require careful assessment to determine whether the victim can continue hiking with support or needs evacuation. I use the "can they bear weight after 10 minutes" rule – if not, prepare for extended care and evacuation procedures.
Hypothermia prevention and treatment demand immediate attention in wilderness settings. Early signs include uncontrolled shivering, loss of fine motor skills, and confusion. I've successfully treated mild hypothermia by providing insulation, dry clothing, warm beverages, and shared body heat in emergency shelters. Severe hypothermia requires gentle handling, as rough movement can trigger cardiac arrhythmias. Always assume hypothermia patients need evacuation unless their condition improves rapidly with treatment.
🏥 Professional Wilderness First Aid Kit
Adventure Medical Kits Mountain Series Hiker Medical Kit
🛒 Shop Medical KitsComprehensive emergency medical supplies designed specifically for backcountry treatment and extended care scenarios.
Wound care in wilderness environments requires preventing infection while managing bleeding and shock. I clean wounds with clean water when available, or saline solution from first aid kits. Proper wound irrigation removes debris and reduces infection risk. Pressure dressing controls bleeding, while elevation helps reduce swelling when anatomically possible. All wounds require monitoring for signs of infection during extended wilderness exposure.
Shock management becomes critical when evacuation delays are expected. Maintaining body temperature, elevating legs when possible, providing reassurance, and monitoring vital signs help prevent shock progression. I maintain detailed patient notes documenting symptoms, treatments provided, and patient responses. This information proves invaluable when transferring care to professional medical personnel. Hiking first aid kit essentials should be tailored to your specific hiking environment and group medical needs.
Emergency Shelter and Survival Priorities
Emergency shelter construction often determines survival outcomes in wilderness emergencies. The Rule of Threes governs survival priorities: three minutes without air, three hours without shelter in harsh conditions, three days without water, and three weeks without food. During a late-season rescue in the Cascades, proper emergency shelter techniques kept a injured hiker warm and stable for 18 hours until helicopter evacuation became possible.
Site selection for emergency shelters requires evaluating wind protection, drainage, overhead hazards, and rescue visibility. I look for natural windbreaks like large rocks or dense vegetation while avoiding potential rockfall areas, flash flood zones, and avalanche paths. Elevated sites provide better drainage but increased wind exposure. The ideal location balances protection with visibility to rescue aircraft and search teams.
Insulation principles become crucial when implementing hiking emergency procedures in cold conditions. Ground insulation prevents conductive heat loss, which occurs 25 times faster than air heat loss. I use sleeping pads, pine boughs, dry leaves, or even backpacks to create barriers between bodies and cold ground. Multiple thin layers provide better insulation than single thick layers because trapped air serves as the primary insulating medium.
🏠 Emergency Shelter Construction Priority
- Protection from wind: Reduces heat loss and improves comfort
- Ground insulation: Prevents conductive cooling
- Overhead protection: Blocks precipitation and radiant heat loss
- Ventilation: Prevents carbon dioxide buildup and condensation
Emergency fire building provides warmth, signaling capability, water purification, and psychological comfort. I always carry multiple fire-starting methods including waterproof matches, lighters, and fire starters. Tinder preparation proves critical in wet conditions – I collect dry bark, pine needles, or paper before they become saturated. Fire lay construction follows the principle of small to large: tinder, kindling, then fuel wood in graduated sizes.
🔥 Emergency Survival Kit
Complete 5-in-1 Survival Whistle with Fire Starter & Emergency Tools
🛒 Get Survival KitMulti-function emergency tool with whistle, compass, signal mirror, fire starter, and storage compartment.
Water procurement and purification become essential during extended emergencies. I identify potential water sources while considering purification requirements and energy expenditure for collection. Boiling remains the most reliable purification method, requiring one minute of rolling boil at sea level, three minutes above 6,500 feet. Water purification tablets provide backup when fuel runs low, though they require 30 minutes to be effective and don't remove particulates or improve taste.
Evacuation Procedures and Rescue Protocols
Evacuation decisions represent some of the most critical aspects of hiking emergency procedures. The evacuation urgency scale helps prioritize response: immediate (life-threatening), urgent (serious injury requiring medical attention within hours), and delayed (stable patient who can wait for optimal evacuation conditions). I've used this framework during multiple rescue operations to allocate resources effectively and coordinate with professional rescue teams.
Self-evacuation assessment requires honest evaluation of victim capability, weather conditions, terrain difficulty, and group resources. Assisted walking works when victims can bear weight and maintain balance with support from others. I use trekking poles or improvised crutches to provide additional stability. The "test walk" approach involves short distances with frequent reassessment – if the victim's condition deteriorates or pain increases significantly, transition to carry evacuation methods.
Improvised litter construction becomes necessary when victims cannot walk and professional rescue teams are unavailable or delayed. I've built effective litters using backpack frames, sleeping pads, and trekking poles lashed together with rope or webbing. The key principles include rigidity to support the victim's spine, padding for comfort during transport, and secure attachment points for carrying straps. Always test litter construction with a healthy person before using it for victim transport.
📋 Evacuation Decision Matrix
| Condition | Method | Timeline |
|---|---|---|
| Self-ambulatory | Walking with rest | Normal pace |
| Assisted walking | Support from others | Extended timeline |
| Carry evacuation | Improvised litter | Requires multiple people |
| Technical rescue | Professional teams | Extended wait time |
Helicopter evacuation requires specific landing zone preparation and communication protocols. I clear areas at least 100 feet in diameter of loose debris, mark wind direction with bright fabric, and position personnel at safe distances from rotor wash. Hand signals communicate with flight crews: arms raised overhead means "land here," arms crossed overhead means "do not land," and arms extended horizontally indicates wind direction. Never approach helicopters without crew permission and direction.
Ground evacuation coordination with search and rescue teams requires providing accurate location information, detailed victim condition reports, and continuous communication updates. GPS coordinates provide precise locations, but backup methods include landmark descriptions, bearing and distance from known points, and trail junction references. I maintain written logs documenting victim condition changes, treatments provided, and resource consumption to inform incoming rescue teams.
🚨 Personal Locator Beacon - Ultimate Safety Net
ACR ResQLink 400 Personal Locator Beacon with GPS
🛒 Shop Safety BeaconsGlobal satellite coverage, 24-hour battery life, waterproof design. Alerts search and rescue within minutes anywhere on Earth.
Conclusion
Mastering hiking emergency procedures requires continuous learning, regular practice, and honest self-assessment of your capabilities and limitations. Throughout my decades of wilderness experience, I've learned that the best emergency is the one that never happens – prevention through proper planning, appropriate gear selection, and conservative decision-making prevents most wilderness emergencies.
The integrated approach to hiking emergency procedures combines preparation, assessment, response, and evacuation into a comprehensive system that adapts to various wilderness scenarios. Regular training in wilderness first aid, navigation, and survival skills provides the foundation for effective emergency response. I recommend taking formal wilderness medical courses and practicing these skills in controlled environments before relying on them during actual emergencies.
Technology continues to improve wilderness safety through satellite communication devices, advanced GPS systems, and improved emergency gear. However, these tools complement rather than replace fundamental wilderness skills and sound judgment. The most sophisticated emergency beacon won't help if you lack the skills to keep yourself and others alive while waiting for rescue.
Remember that hiking emergency procedures are not just individual skills – they represent community knowledge passed down through generations of outdoor enthusiasts, professional rescuers, and wilderness educators. Share your knowledge with other hikers, mentor newcomers to the wilderness, and continue learning from every outdoor experience. The mountains will always present challenges, but proper preparation and knowledge help ensure that every hiking adventure ends safely at home.
🏔️ Stay Safe, Stay Prepared
Your next wilderness adventure awaits – make sure you're prepared for whatever the trail brings.
Remember: The best rescue is the one that never needs to happen. Plan thoroughly, hike responsibly, and always prioritize safety over summit success.

