


After years of camping in the Pacific Northwest's unpredictable weather, I've learned that knowing how to seam seal a rain fly is essential for any serious outdoor enthusiast. This comprehensive guide will walk you through every step of the process, from selecting the right materials to achieving professional-level waterproofing results that will keep you dry during the most challenging conditions.
Why Seam Sealing Your Rain Fly is Critical
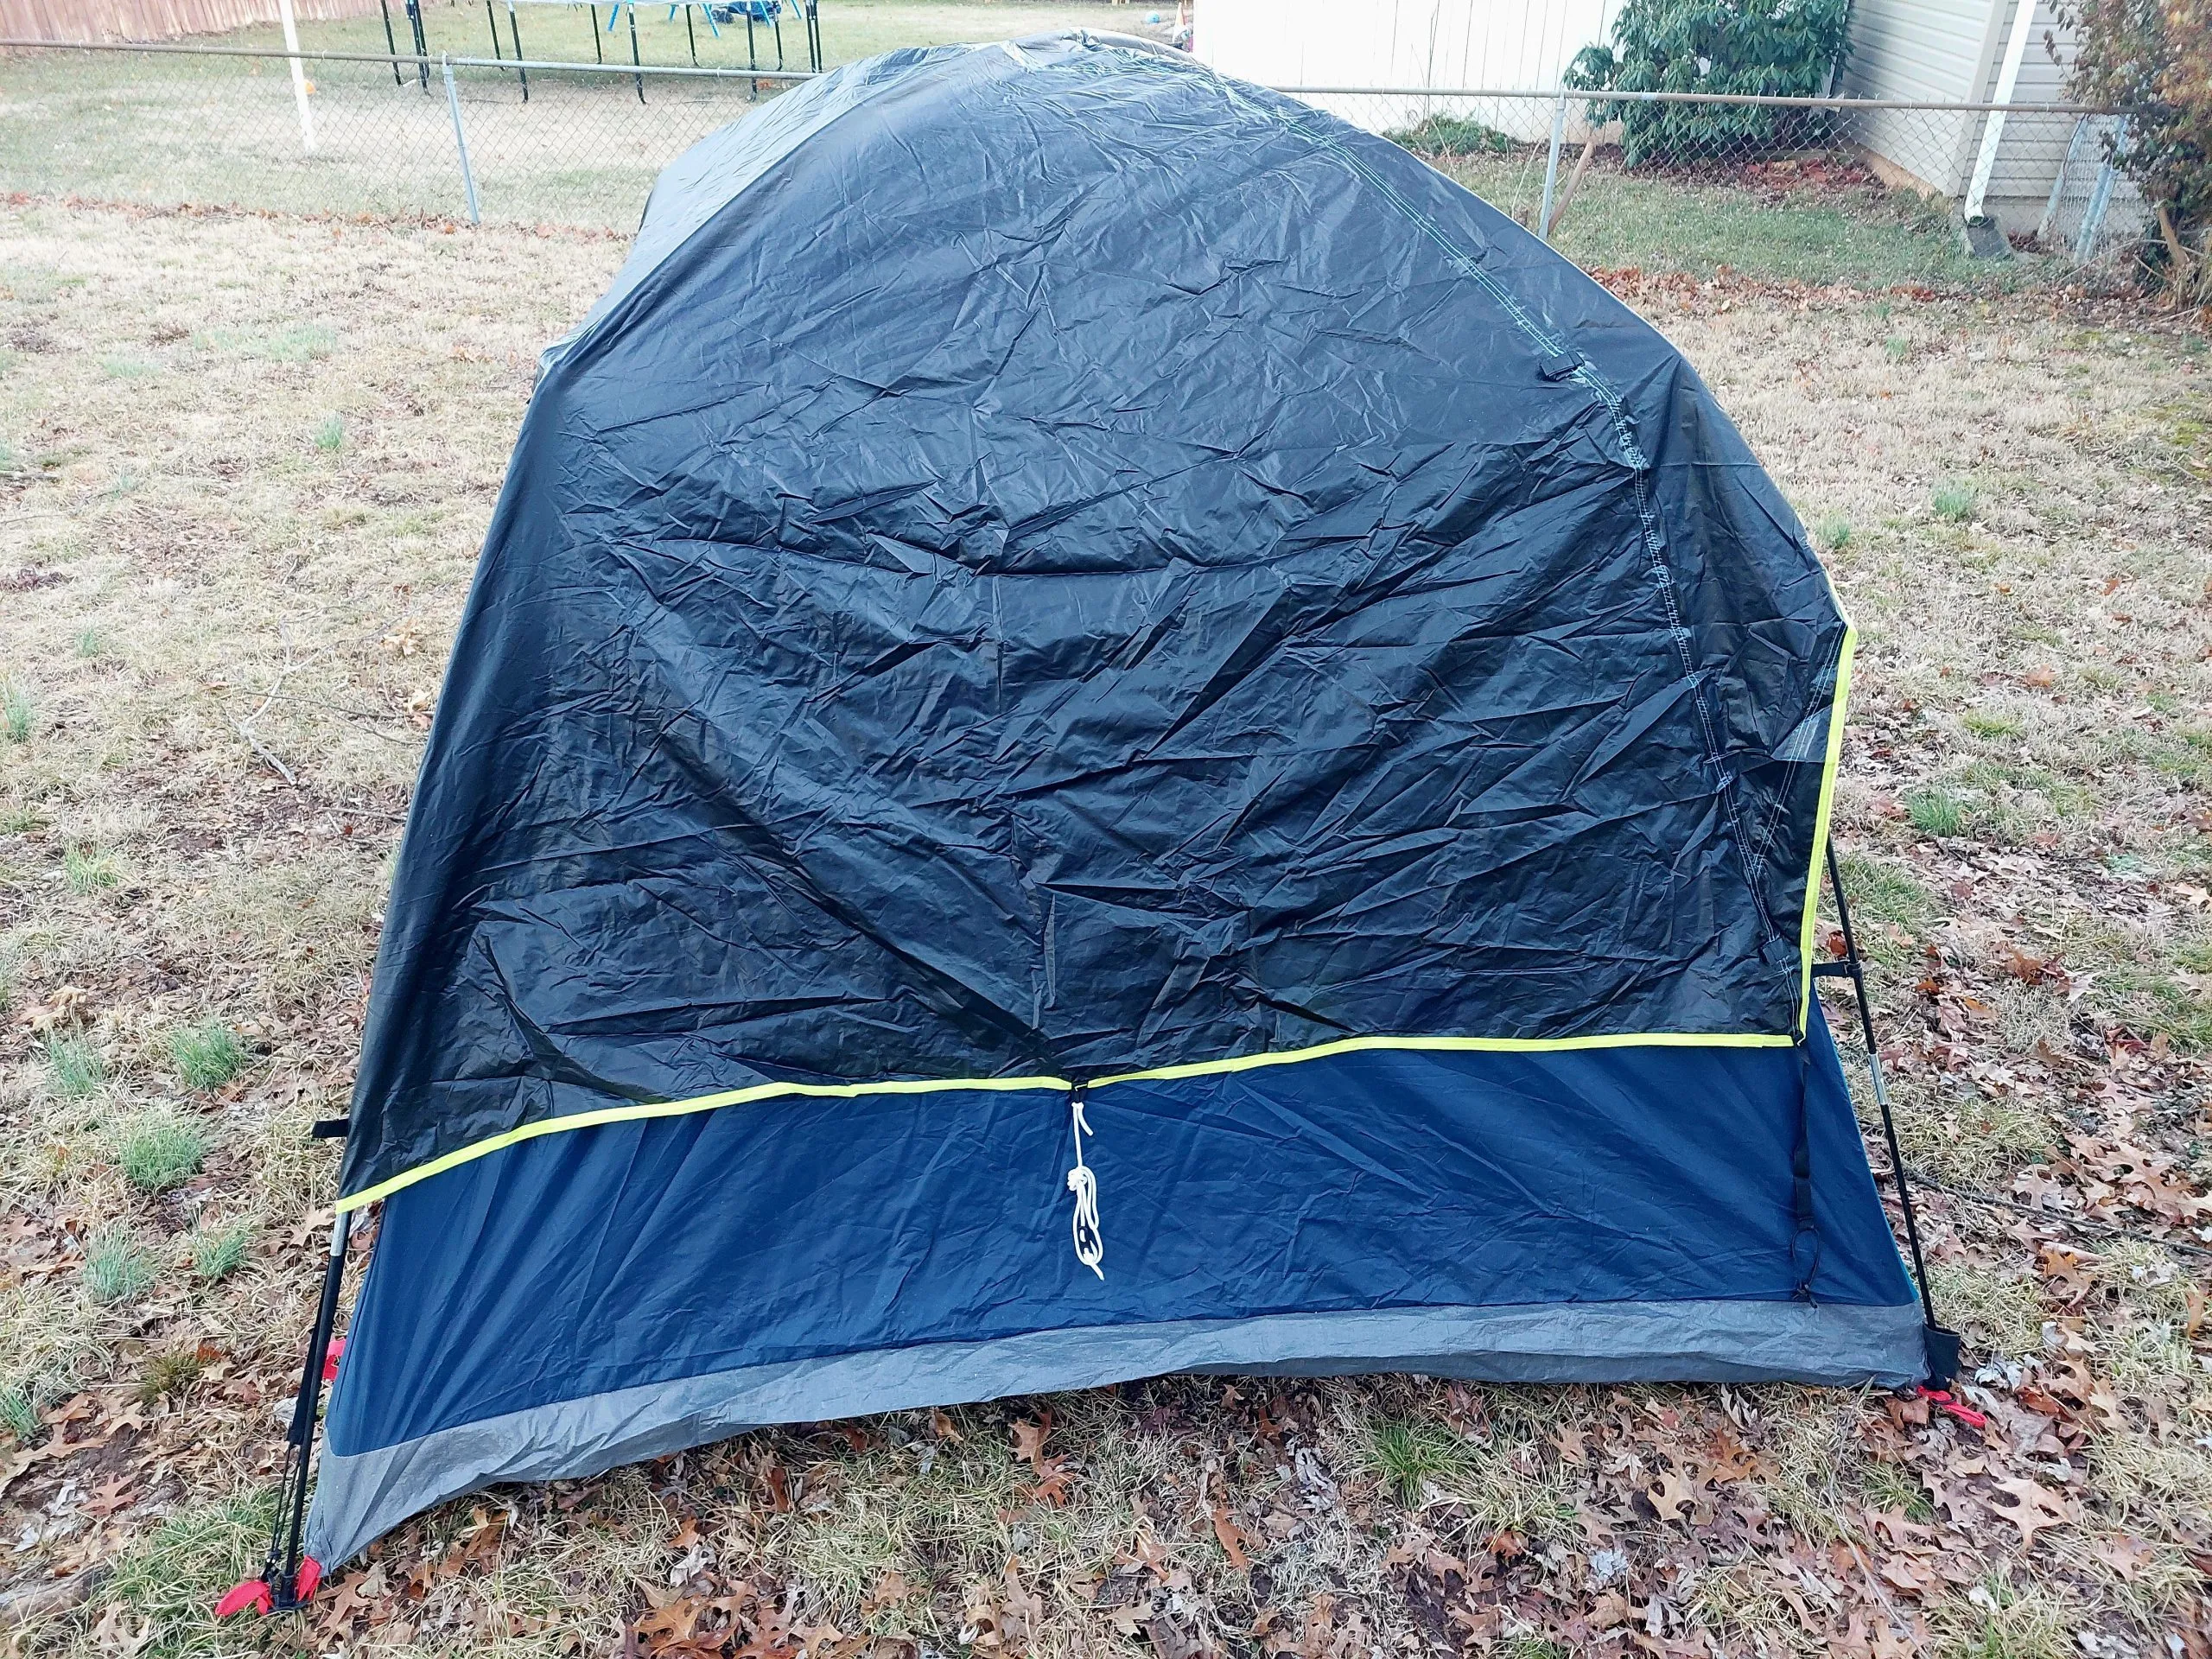
During my first backpacking trip to Olympic National Park, I discovered the hard way why understanding how to seam seal a rain fly is absolutely essential. Despite having a supposedly waterproof tent, I woke up to dripping water seeping through the seams during a particularly heavy downpour. That experience taught me that even the highest-quality tents can fail at their most vulnerable points - the seams.
Rain flies are your tent's first line of defense against moisture, but they're only as strong as their weakest point. When manufacturers stitch fabric together, they create thousands of tiny holes where needles penetrate the material. While the fabric itself may be waterproof, these needle holes create pathways for water infiltration. Professional seam sealing creates a waterproof barrier that prevents moisture from entering through these vulnerable areas.
The process becomes even more critical when you consider that rain flies endure constant stress from wind, UV exposure, and temperature fluctuations. Over time, factory-applied seam tape can deteriorate, peel, or lose its adhesive properties. I've seen countless camping trips ruined by inadequate seam sealing, which is why I always recommend that outdoor enthusiasts learn how to seam seal a rain fly properly.
For more comprehensive tent waterproofing information, visit Nature Guests, where you'll find additional resources about waterproofing tent seams and maintaining your outdoor gear.
Essential Materials and Tools
Success in learning how to seam seal a rain fly depends heavily on using the right materials and tools. Through years of experience working with various tent fabrics and weather conditions, I've identified the essential items that make the difference between a professional-quality seal and a temporary fix.
Premium Seam Sealers
Buy Gear Aid Seam Grip WP - $9.79The gold standard for polyurethane-coated fabrics. This waterproof sealant provides excellent adhesion and flexibility.
Silicone-Based Sealers
Buy Seam Grip SIL - $8.60Perfect for silicone-treated fabrics and Dyneema Composite Fabric (DCF) tents.
The key to understanding how to seam seal a rain fly effectively lies in matching the right sealer to your tent's fabric type. Polyurethane-coated fabrics require urethane-based sealers, while silicone-treated materials need silicone-based products. Using the wrong type can result in poor adhesion and ultimately, seal failure.
Essential Tools Checklist:
- Small brush or applicator (usually included with sealers)
- Rubbing alcohol for surface preparation
- Clean rags or paper towels
- Painter's tape for protecting zippers and mesh
- Drop cloth or plastic sheeting
- Good lighting or headlamp
For comprehensive tent fabric treatment, I also recommend having a quality waterproofing spray on hand. The Nikwax Tent & Gear Care is excellent for refreshing the DWR (Durable Water Repellent) coating on your rain fly's exterior surface. Learn more about this process in our detailed guide on how to waterproof a tent rain fly.
Preparation and Setup
Proper preparation is crucial when learning how to seam seal a rain fly. After working with hundreds of tents in various conditions, I've found that taking time to properly prepare your workspace and materials makes the difference between a successful seal and a frustrating experience that requires redoing the entire process.
Weather conditions play a critical role in seam sealing success. I always choose a dry, warm day with temperatures between 60-80°F and humidity below 50%. During my years of camping in the Cascade Mountains, I've learned that attempting to seal seams in humid conditions or impending rain leads to poor adhesion and extended drying times.
Step-by-Step Preparation Process:
Begin by setting up your tent in a well-ventilated area, preferably outdoors on a calm day. If working indoors, ensure adequate ventilation as sealant fumes can be overwhelming. Position your rain fly inside-out so you can access the seams from the interior side - this is where you'll apply the sealant.
Next, thoroughly inspect all seams for existing damage or peeling factory seam tape. I use a systematic approach, starting from one corner and working my way around the entire rain fly. Pay special attention to high-stress areas like guy-out points and corners where the fabric experiences the most tension.
Clean the seams with rubbing alcohol to remove any dirt, oils, or residue that could interfere with adhesion. This step is particularly important if you're working with an older tent or one that's been stored for an extended period. Allow the alcohol to fully evaporate before proceeding - this usually takes 5-10 minutes in good conditions.
If you're dealing with peeling factory seam tape, this is the time to remove it. I've found that patience is key here - rushing this step often results in fabric damage. For stubborn tape, try warming it slightly with a hair dryer (on low setting) to soften the adhesive. For more detailed information about different seam sealing materials, check out our comprehensive guide on seam sealant for tents.
Step-by-Step Seam Sealing Process
Now comes the critical part of learning how to seam seal a rain fly - the actual application process. Having sealed hundreds of tents over the years, I've refined this technique to ensure consistent, professional results every time. The key is patience and attention to detail.
Important Safety Note:
Always work in a well-ventilated area and consider wearing nitrile gloves to protect your hands from sealant chemicals.
Application Technique:
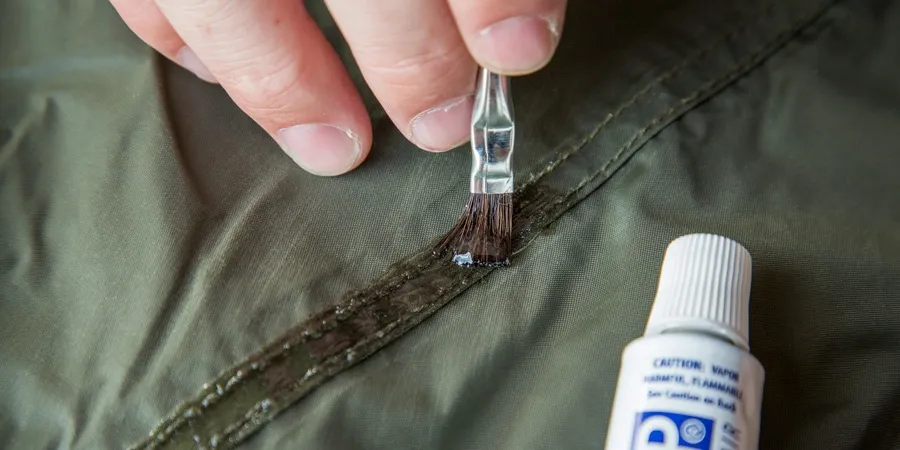
Start with the most critical seams - typically the ridgeline and any areas where water is likely to pool. Apply the sealant in thin, even coats using the included brush or applicator. I've found that multiple thin coats provide better coverage and adhesion than one thick application.
Work the sealant thoroughly into the needle holes and fabric fibers. Use a dabbing motion rather than brushing, which can create air bubbles or uneven coverage. Pay special attention to corners and stress points where the fabric is sewn together at multiple angles.
For the best results when learning how to seam seal a rain fly, maintain consistent pressure and speed throughout the application. I typically work in 2-3 foot sections, completing each area before moving to the next. This prevents the sealant from becoming tacky while you're still working with it.
Fast-Cure Options
Buy Seam Grip FC - $18.99Perfect for quick repairs or when you need faster curing times.
After application, avoid disturbing the treated areas for at least 2-4 hours. Full cure time depends on the product used but typically ranges from 8-24 hours. During this time, keep the tent in a dry, ventilated area away from direct sunlight, which can cause uneven curing.
For additional protection and information about seam sealing tape applications, visit our guide on tent seam sealer tape, which covers alternative sealing methods and when to use them.
Troubleshooting Common Issues

Even experienced campers encounter challenges when learning how to seam seal a rain fly. Over my years of helping fellow outdoor enthusiasts with their gear, I've identified the most common issues and their solutions. Understanding these problems beforehand can save you significant time and frustration.
Poor Adhesion Problems:
The most frequent issue I encounter is sealant that doesn't properly adhere to the fabric. This usually occurs when the surface wasn't adequately cleaned or when moisture is present during application. If you notice the sealant peeling or flaking after curing, you'll need to remove it completely and start over.
Temperature and humidity significantly impact adhesion. During my camping trips in the Olympic Peninsula, I've learned that coastal moisture can interfere with curing even when it appears dry outside. Always check the weather forecast and ensure you have at least 24 hours of dry conditions ahead.
Compatibility Issues:
Using the wrong sealer type is another common mistake. Silicone sealers won't properly adhere to polyurethane-coated fabrics, and vice versa. If you're unsure about your tent's coating, contact the manufacturer or perform a small test patch in an inconspicuous area.
When dealing with older tents where the original coating is deteriorating, you may need to remove the failing coating before applying new sealant. This process requires patience and often involves scraping or using specialized cleaning products.
Application Mistakes:
Applying sealant too thickly is a common error that leads to longer cure times and potential seal failure. Remember that multiple thin coats are always better than one thick application. If you've applied too much sealant, it's better to remove it and start over than to wait for improper curing.
Another frequent issue is sealing seams that are still damp or contaminated with soap residue. Always ensure seams are completely dry and clean before beginning the process. For more detailed troubleshooting information, visit our main resource at how to seam seal a rain fly.
Pro Tip:
Keep a small amount of sealant for future touch-ups. Store it in a cool, dry place and check the expiration date before use.
Long-term Maintenance and Care
Understanding how to seam seal a rain fly is just the beginning of proper tent maintenance. Through decades of outdoor adventures across diverse climates - from the humid forests of the Pacific Northwest to the dry deserts of the Southwest - I've learned that ongoing care is essential for maintaining your seam seals' effectiveness.
Regular inspection should become part of your pre-trip routine. Before each camping excursion, I examine all seams for signs of wear, particularly focusing on high-stress areas like guy-out points and corners. Small issues caught early can be addressed with simple touch-ups, preventing more extensive repairs later.
Seasonal Maintenance Schedule:
I recommend performing thorough seam inspections at the beginning and end of each camping season. Spring preparation should include checking for any damage from winter storage, while fall maintenance focuses on addressing wear from the season's use. This proactive approach has saved me countless hours of emergency repairs in the field.
UV exposure gradually degrades seam seals, particularly in high-altitude environments where UV intensity is greater. During my mountaineering expeditions, I've noticed that seals on south-facing tent panels deteriorate faster than those on shaded sections. Consider applying UV-protective treatments or storing your tent in shaded areas when possible.
Temperature extremes also affect seal longevity. Extreme cold can make seals brittle, while excessive heat can cause them to become gummy or lose adhesion. When camping in temperature extremes, allow your tent to acclimate gradually rather than exposing it to sudden temperature changes.
Storage and Handling:
Proper storage significantly extends the life of your seam seals. Always ensure your tent is completely dry before storing - even minimal moisture can lead to mold growth and seal degradation. I store my tents loosely packed in breathable storage bags, avoiding compression that could stress the seams.
When setting up and breaking down your tent, handle the rain fly gently to avoid unnecessary stress on the seams. Avoid dragging the fabric across rough surfaces, and be careful not to over-tension guy-lines, which can strain seam areas.
For comprehensive maintenance guidance and additional waterproofing techniques, I recommend checking out our detailed resources. These include information about preventive care and when to consider professional repairs versus DIY solutions.
Conclusion
Mastering how to seam seal a rain fly is an invaluable skill that will serve you throughout your outdoor adventures. Through years of experience in diverse weather conditions and environments, I've learned that proper seam sealing is not just about keeping water out - it's about ensuring your confidence and comfort in the wilderness.
The techniques and materials I've shared in this guide represent time-tested methods that have kept me dry during countless storms. Remember that patience and attention to detail are your greatest allies in this process. Taking the time to properly prepare your materials, choose the right sealant, and apply it correctly will reward you with years of reliable waterproof protection.
As you continue your outdoor journey, remember that knowing how to seam seal a rain fly is just one aspect of comprehensive gear maintenance. Regular inspection, proper storage, and proactive care will ensure that your tent remains a reliable shelter for years to come.
Essential Product Recommendations
Whether you're preparing for a weekend camping trip or a multi-week expedition, the skills you've learned here will serve you well. Stay dry, stay comfortable, and enjoy the confidence that comes with properly maintained gear. Happy camping!